Looking for help?
Find answers to your questions
-
Instructions
- Descaling
- Disassembly
- Replacing the safety ring
- Replacing the safety valve
- How To Fit The Overheat Repair Kit
- Low shot weight
- My safety valve opened
- Water is leaking from beneath the portafilter
- Water is leaking from the safety valve
- Water is leaking from the side of the machine
- My machine isn't producing espresso
- Water is spitting from the chimney
- Coffee is bubbling from the portafilter
- How to look after your heat transfer plate
Replacing the safety valve
Tools and parts required
- A replacement safety valve
- A 1/2" spanner/wrench. It's important that a correctly-sized or adjusted spanner is used.
Safety Warnings
- Do not attempt to adjust the locking nut on the safety valve. The locking nut sets the valve opening pressure and can only be adjusted with special tooling.
- Do not attempt to remove the safety valve while the machine is hot. Allow the machine to fully cool down to room temperature before removing the safety valve.
- Do not use a safety valve which appears damaged or which has been tampered with in any way. It is a safety device which ensures that the machine cannot operate in a dangerous state.
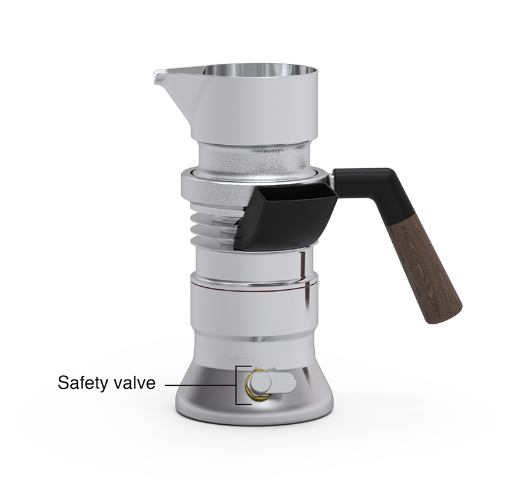
Where the Safety Valve is on your machine:
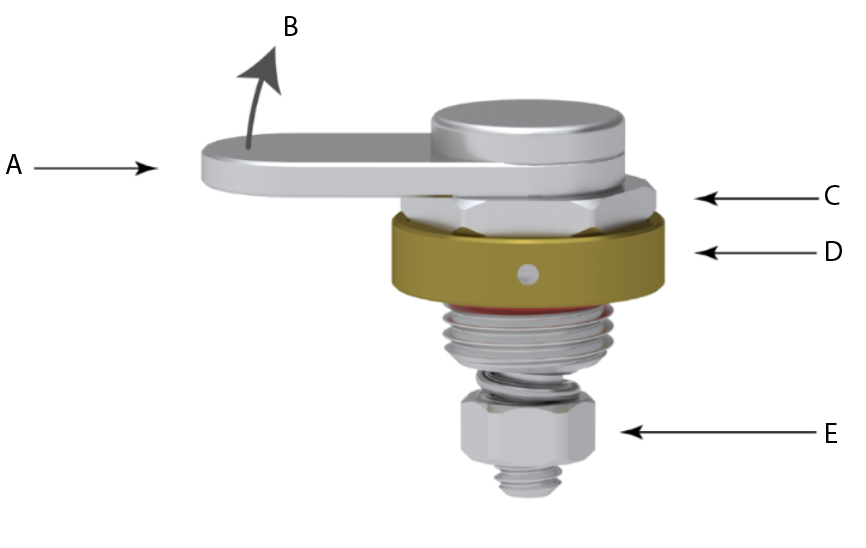
Key Parts of the Safety Valve:
A = Pressure Release Tab
B = Direction to pull Pressure Release Tab
C = Spanner/Wrench location
D = Safety Ring (gold)
E = Locking Nut (do not attempt to adjust)
Instructions
Step One
Replacing the safety valve is a simple process. With the right tools it shouldn’t take more than a minute.
After brewing an espresso, and once the machine is completely cool – you should press/lift the pressure relief tab on the safety valve (see image below) to equalise the vacuum in the boiler. You'll hear a slight hiss; this will make unscrewing the boiler much easier, and will also protect the boiler o-ring.
Step Two
Remove the existing safety valve by unscrewing it from the boiler by using the ½” spanner/wrench, turning it anti-clockwise to loosen it. You should place your spanner around the hexagonal section with flat sides.
Step Three
Screw the new safety valve into the boiler. Screw it in hand tight, in the clockwise direction, then use the ½” spanner/wrench to tighten so there is “metal on metal” contact between the boiler and the valve. You won’t need to tighten it very hard, the thing to feel for is a sudden increase in resistance when screwing it in (that’s when you get metal-on-metal contact).
That’s it! If you have any questions, please contact us.
Updated on 18 May 2026