Looking for help?
Find answers to your questions
Disassembly
You may occasionally wish to disassemble your 9Barista machine to either replace or upgrade a component. We’ll show you how to do that here. The text below breaks the process down into steps, and the video at the bottom of the page demonstrates how to reassemble your machine.
Tools required
- 3mm Hex key
- 1/2" spanner/wrench (only if you need to remove the Safety valve or Boiler pipe)
- T10 Torx screw driver (only if you need to remove the Chimney)
- Note: it’s important that correctly-sized tools are used.
Step 1
Remove the portafilter and unscrew the boiler until you feel the boiler o-ring disengage. There will be about a 3mm gap between the top of the boiler and the bottom of the grouphead.

Step 2
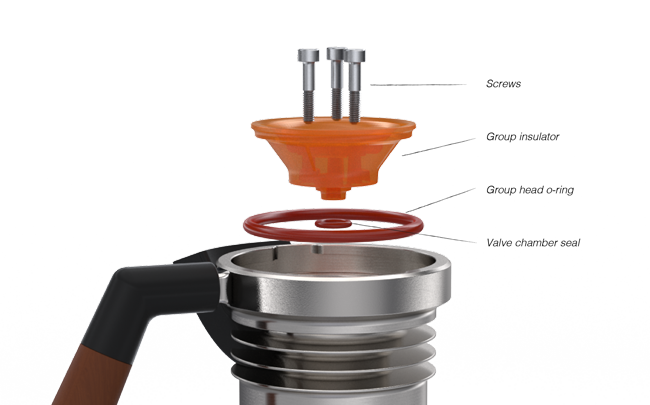
Unscrew the three grouphead screws using the 3mm Hex key. The orange part, which is the group insulator, will spring up once the last screw is removed, so take care to gently hold it in place so you don’t lose any parts. You will now be able to remove the group insulator, the grouphead o-ring and the valve chamber seal.
Step 3
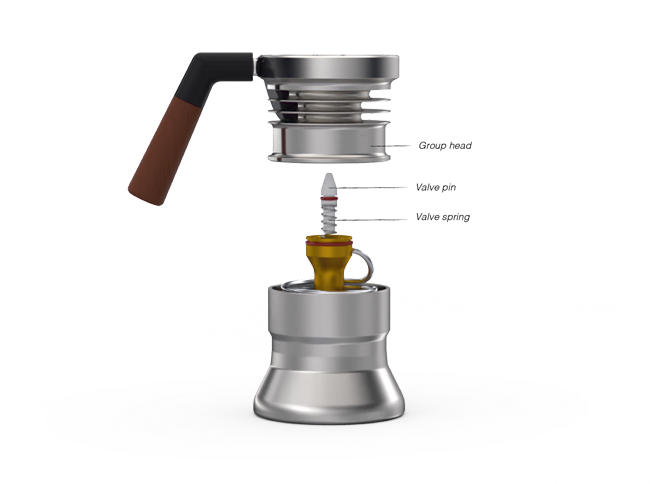
Lift the grouphead off, and take out the valve pin and the valve spring. This disassembly step involves uncovering the sprung valve pin. Take care and do not look directly into the valve chamber until you are sure the spring is relaxed and the valve pin will not pop out unexpectedly.
Step 4
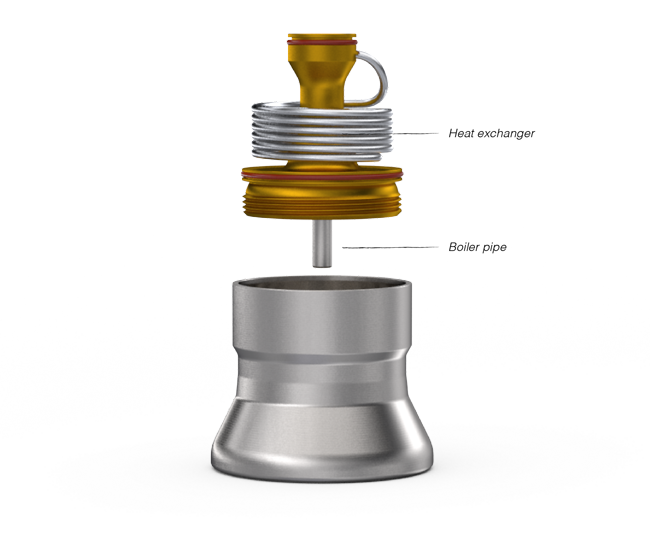
Finally, twist the heat exchanger coil anti-clockwise to remove it from the boiler. From this point replacing any individual component should be straight forward.
Step 5
Perform the following maintenance checks:
- Check for any signs of damage to any of the o-rings, and replace if necessary.
- Gently clean and rinse the valve pin, making sure there is no scale or grit on either the valve pin or the spring. Next, check that the valve chamber is also clean.
- Check for a blockage in the heat exchanger coil by blowing into the boiler pipe. You should be able to blow a small amount of air through. It may help to submerge the other end of the heat exchanger in water to see if bubbles come out. If you can, there’s not a blockage.
- If you can’t blow through the boiler pipe, unscrew it and hold it up to the light to see if there’s any debris blocking the end. If there is, use a pin to dislodge and remove it, before screwing back into place. Tightening it with your fingers should be sufficient; turn until you feel resistance against the thermal break (the circular piece of black silicone rubber).
- Again, try to blow through the heat exchanger coil. If you can’t, and you know the boiler pipe is not blocked, it means that there’s a blockage in your heat exchanger coil. If this is the case please contact us and we’ll help you further.
Step 6
Reassemble the machine by following the steps 1 to 4 in reverse order. The video below demonstrates how to do this. When assembling the air cooler back onto the valve body, ensure there is at least 3mm of gap between the air cooler and the top of the boiler as in the step before tightening the screws. Failure to leave a gap can bend the air cooler irreparably.
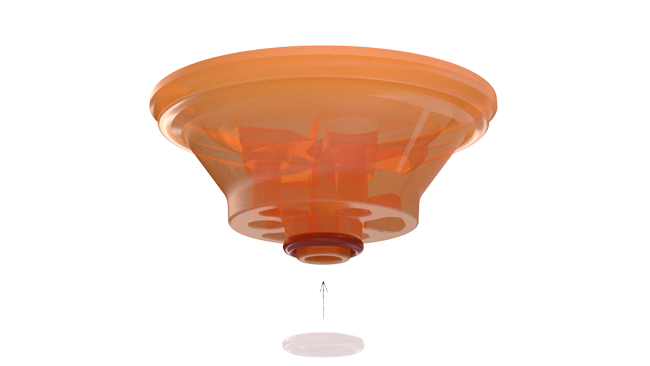
When you come to fit the group insulator, be careful that the valve chamber seal locates correctly. To do this, position the valve chamber seal around the tip of the group insulator, then dab it with water and press the these two parts on to the grouphead. If the group insulator is pushed up by the spring before you attach one of the three screws, the valve chamber seal may have dislodged.
Disassembly Video
Reassembly Video