Looking for help?
Find answers to your questions
-
Instructions
- Descaling
- Disassembly
- Replacing the safety ring
- Replacing the safety valve
- How To Fit The Overheat Repair Kit
- Low shot weight
- My safety valve opened
- Water is leaking from beneath the portafilter
- Water is leaking from the safety valve
- Water is leaking from the side of the machine
- My machine isn't producing espresso
- Water is spitting from the chimney
- Coffee is bubbling from the portafilter
- How to look after your heat transfer plate
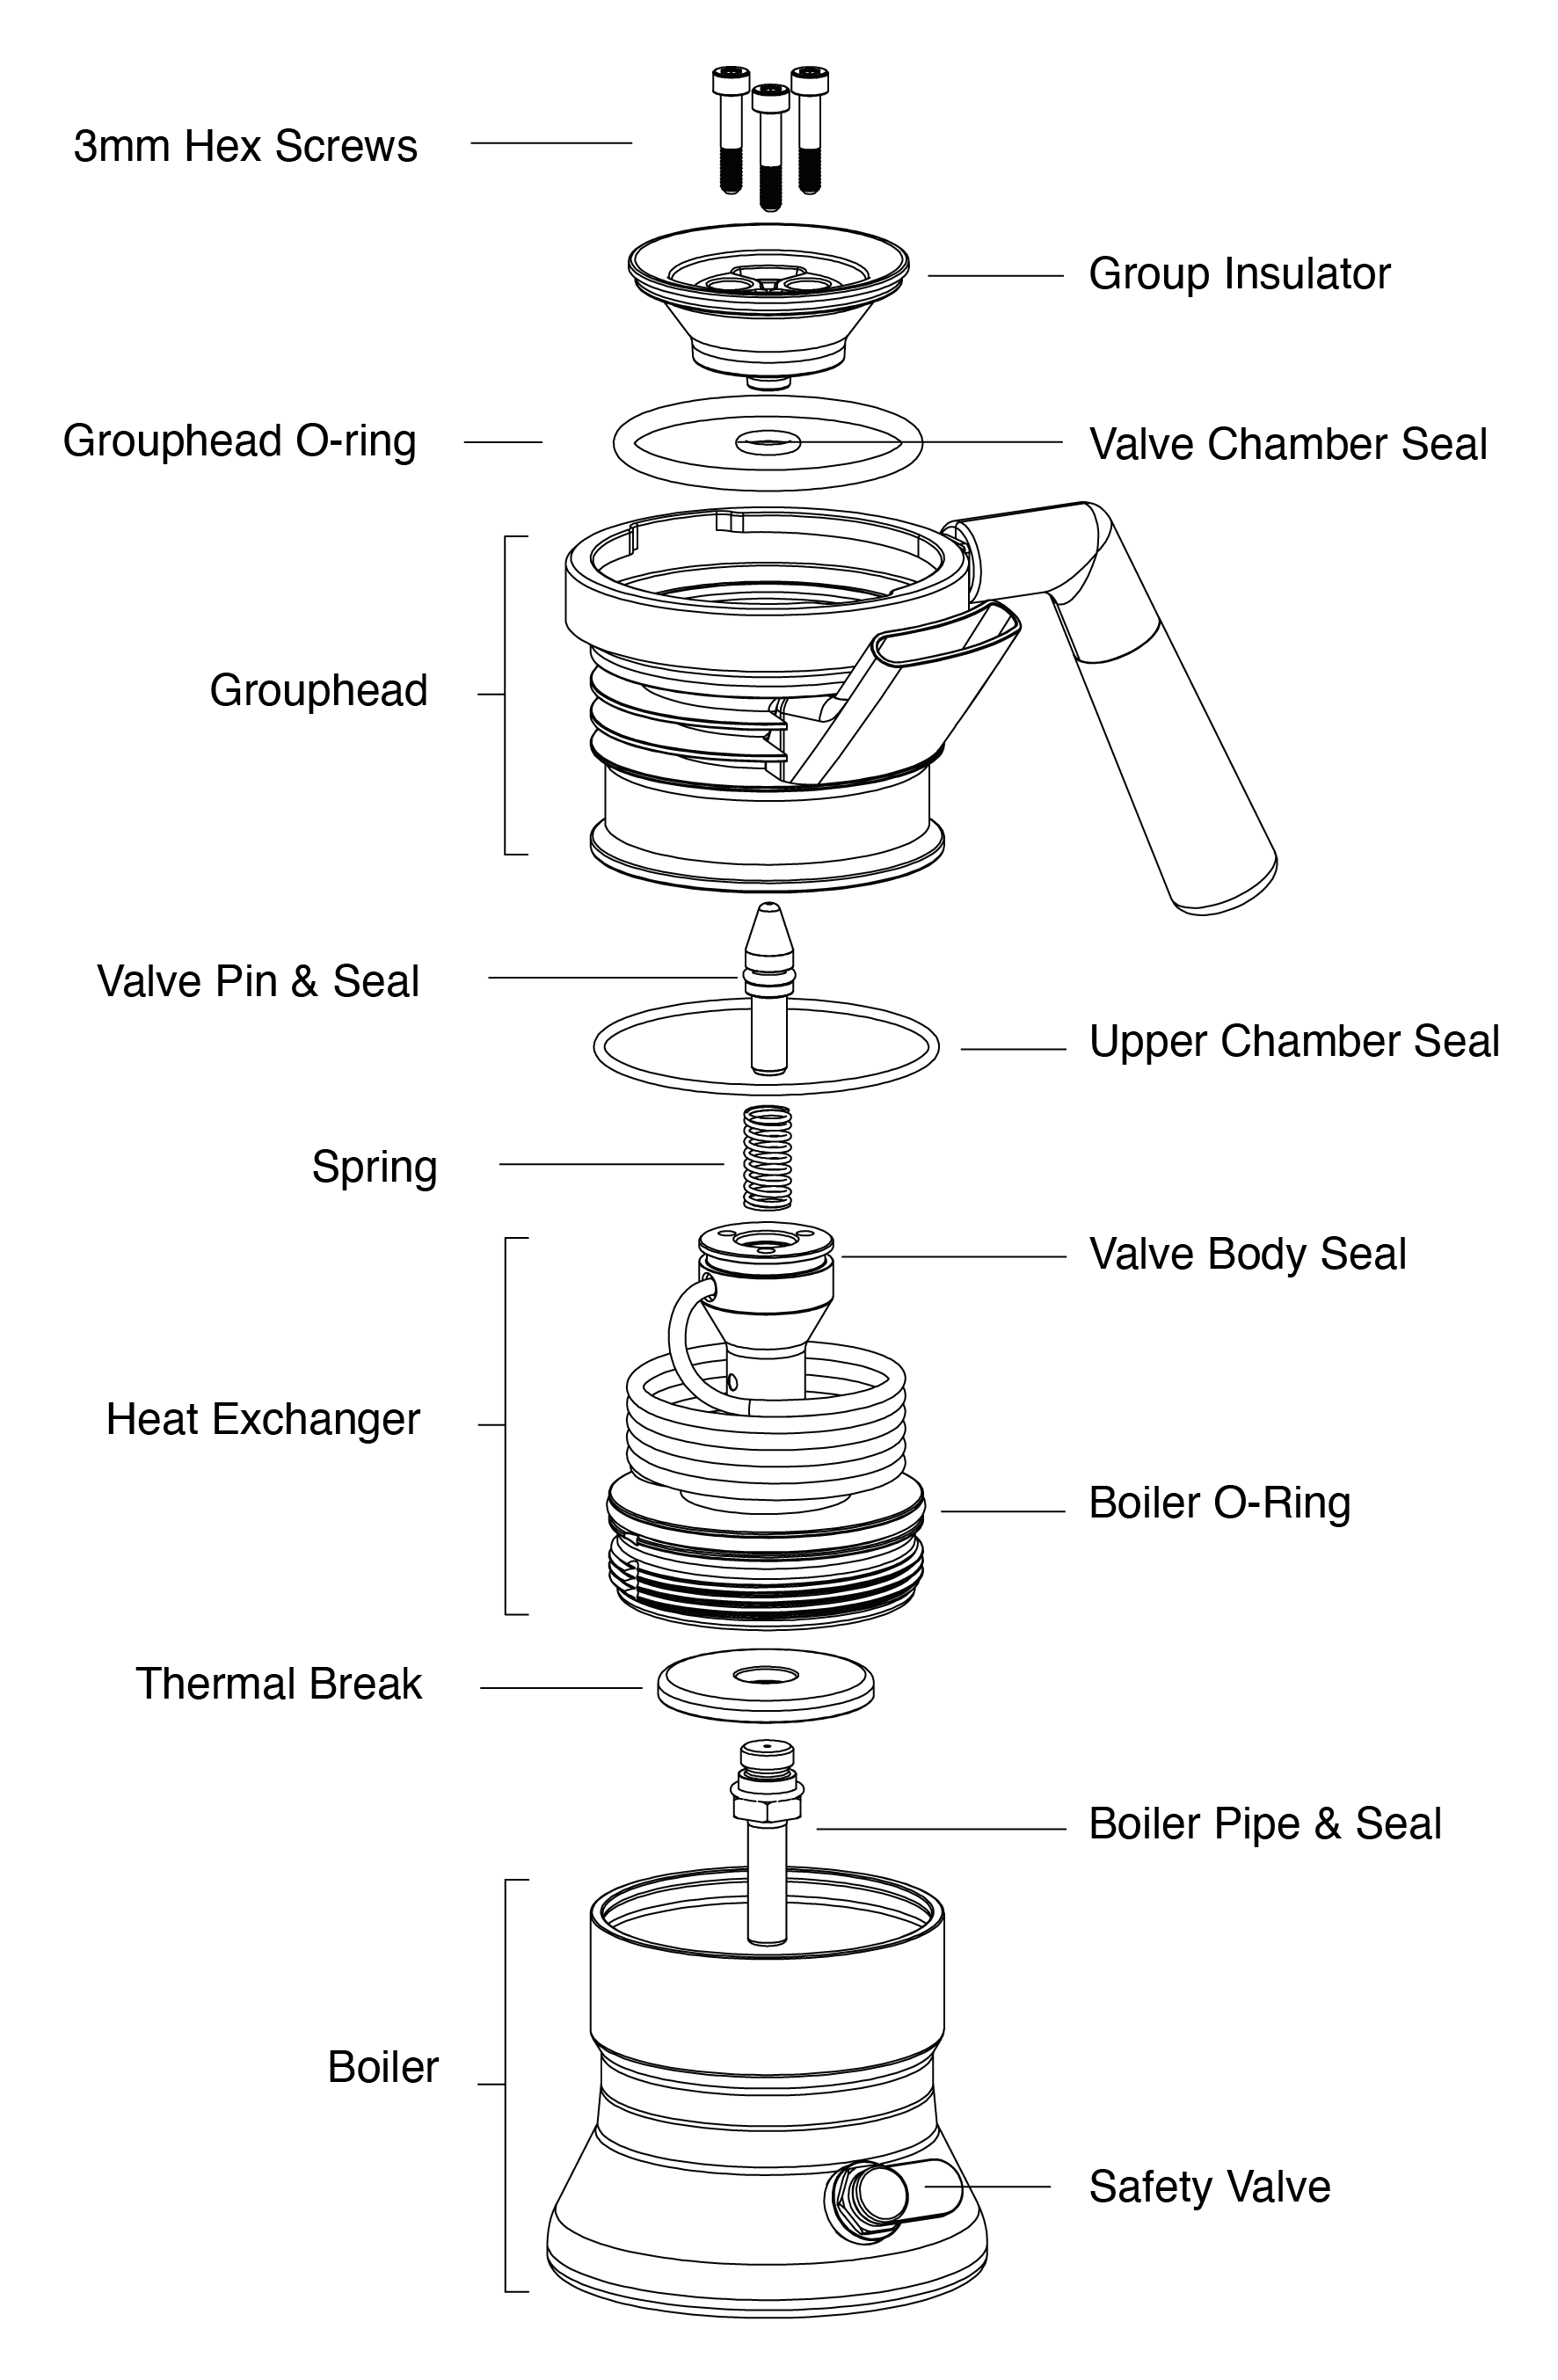
Disassembly
You may need to disassemble your 9Barista to replace or upgrade a part. Follow the steps below, and watch the video for reassembly. Dissassembling the machine take about 5 minutes.
Tools required
Note: It's important that correctly sized tools are used to avoid damaging the machine.
- 3mm Hex key/Allen wrench
- 1/2" spanner/wrench (only if you need to remove the Safety valve or Boiler pipe)
- Cross head screw driver (PZ.2 size) (only if you need to remove the Chimney)
Step 1
Remove the Portafilter and unscrew the Boiler until you feel the Boiler O-ring disengage. There will be about a 3mm gap between the top of the Boiler and the bottom of the Grouphead.

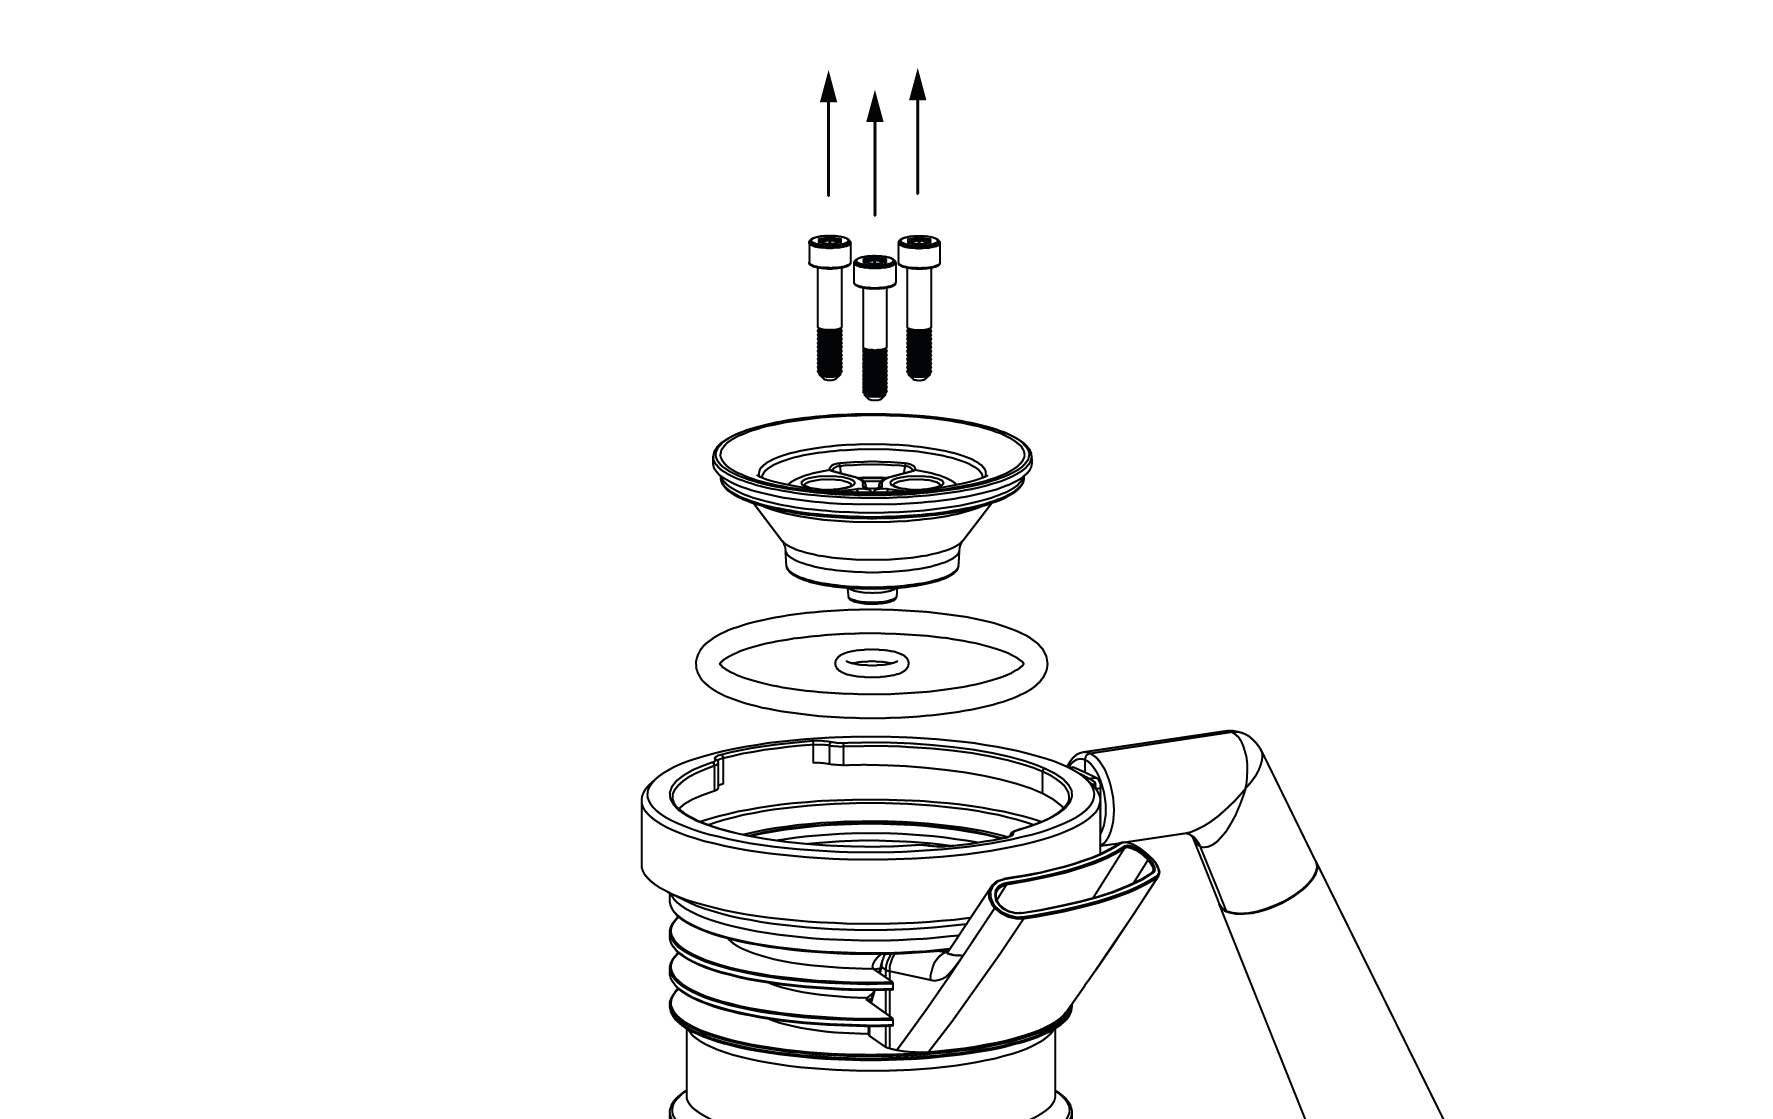
Step 2
Unscrew the three Grouphead Screws using the 3mm Hex key. The Group Insulator may spring up once the last screw is removed, so take care to hold it in place as the screws are removed. Remove the Group Insulator, Grouphead O-ring, Valve Chamber Seal and the three Hex Screws.
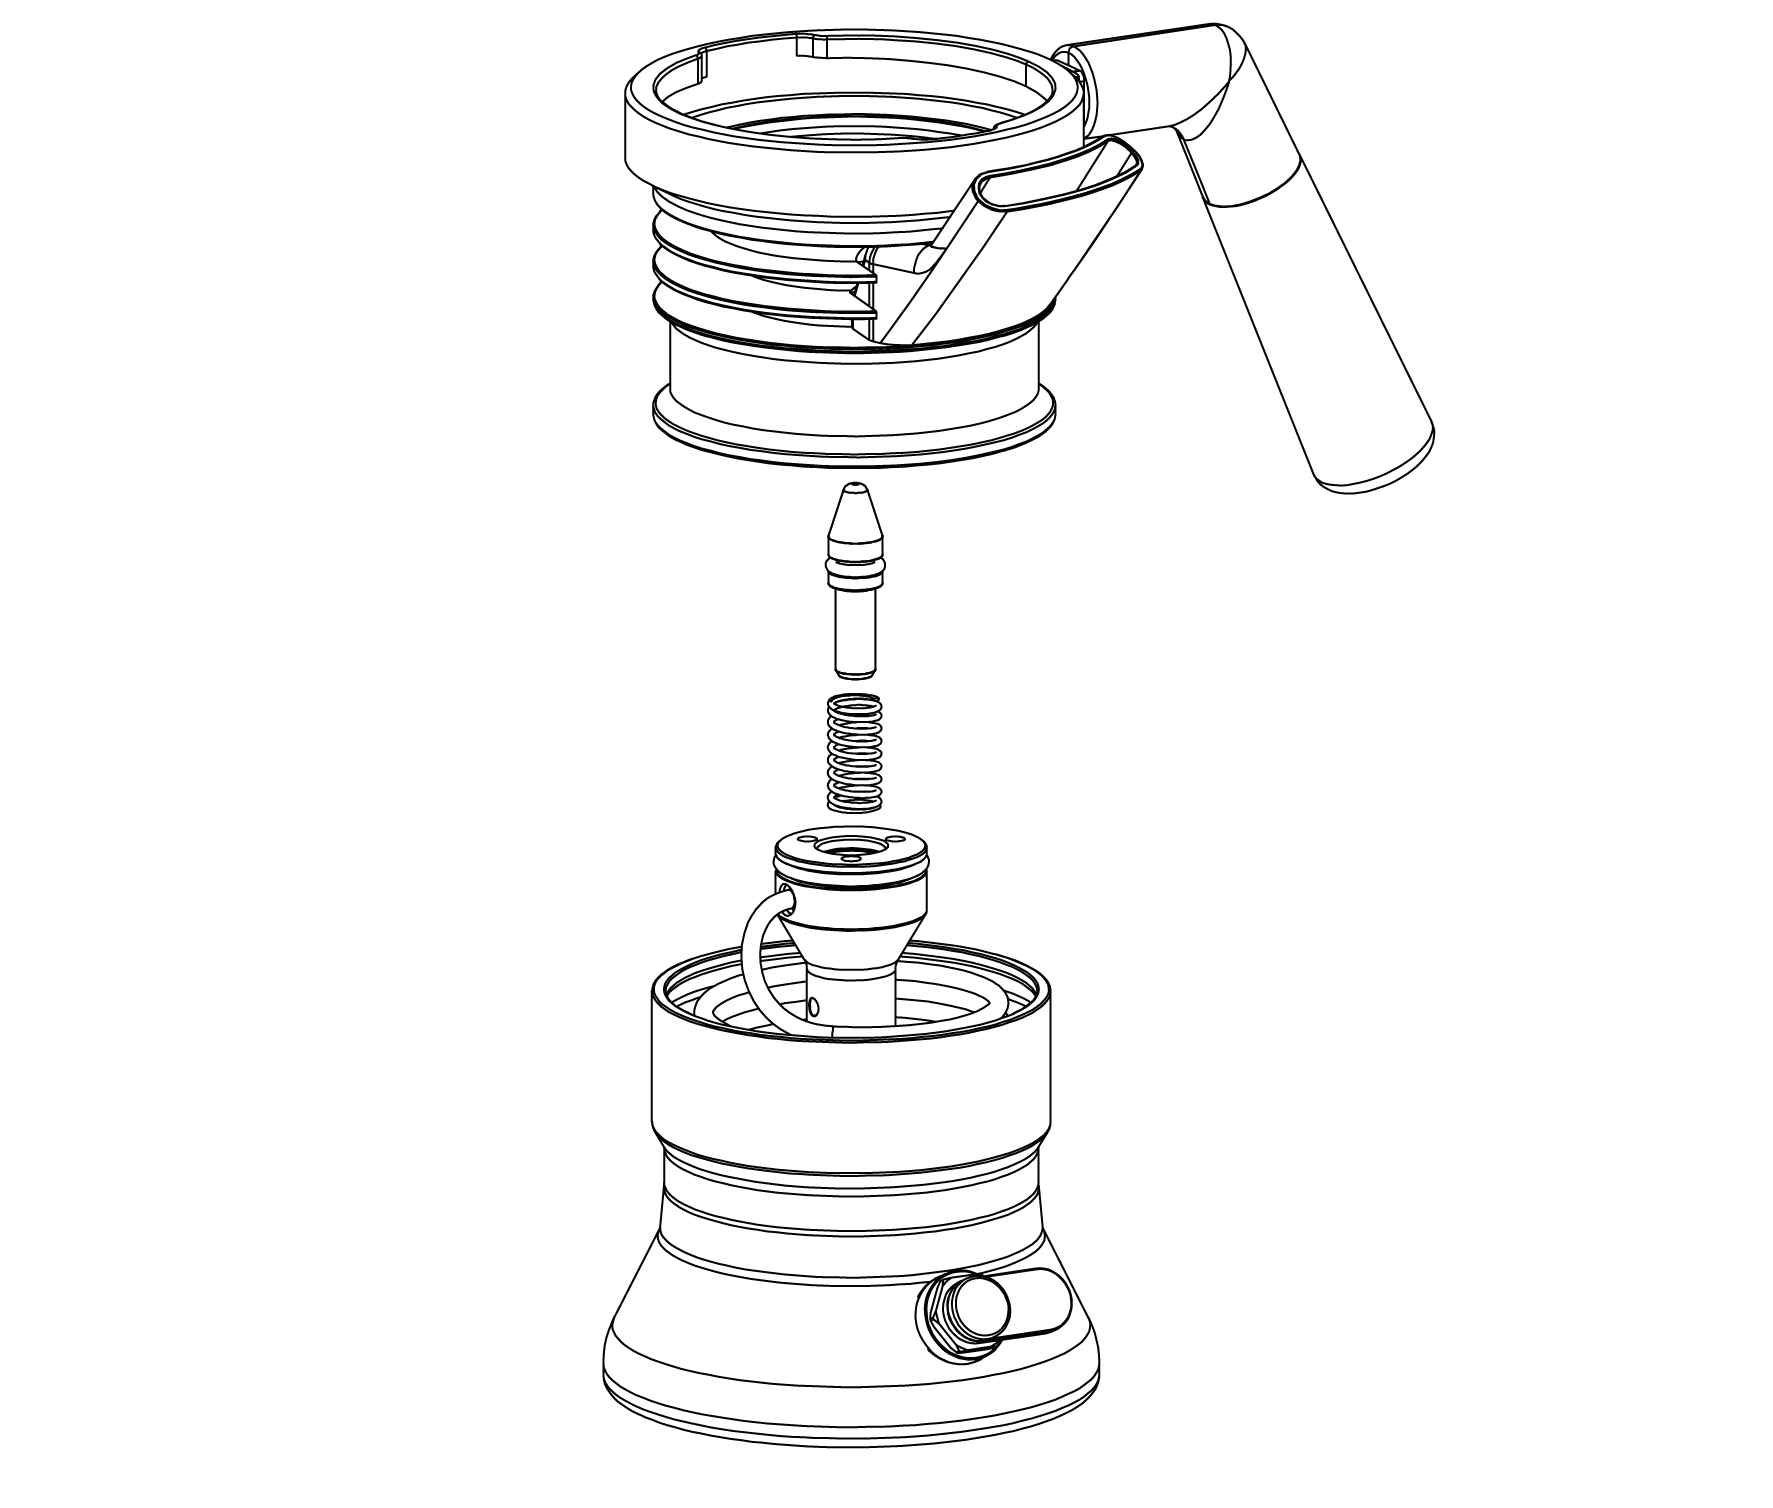
Step 3
Lift the Grouphead off, and take out the Valve Pin & Seal and the Spring. This disassembly step involves uncovering the sprung valve pin. Take care and do not look directly over the Valve Pin until it is removed, as it may be spring out suddently if is has become seized.
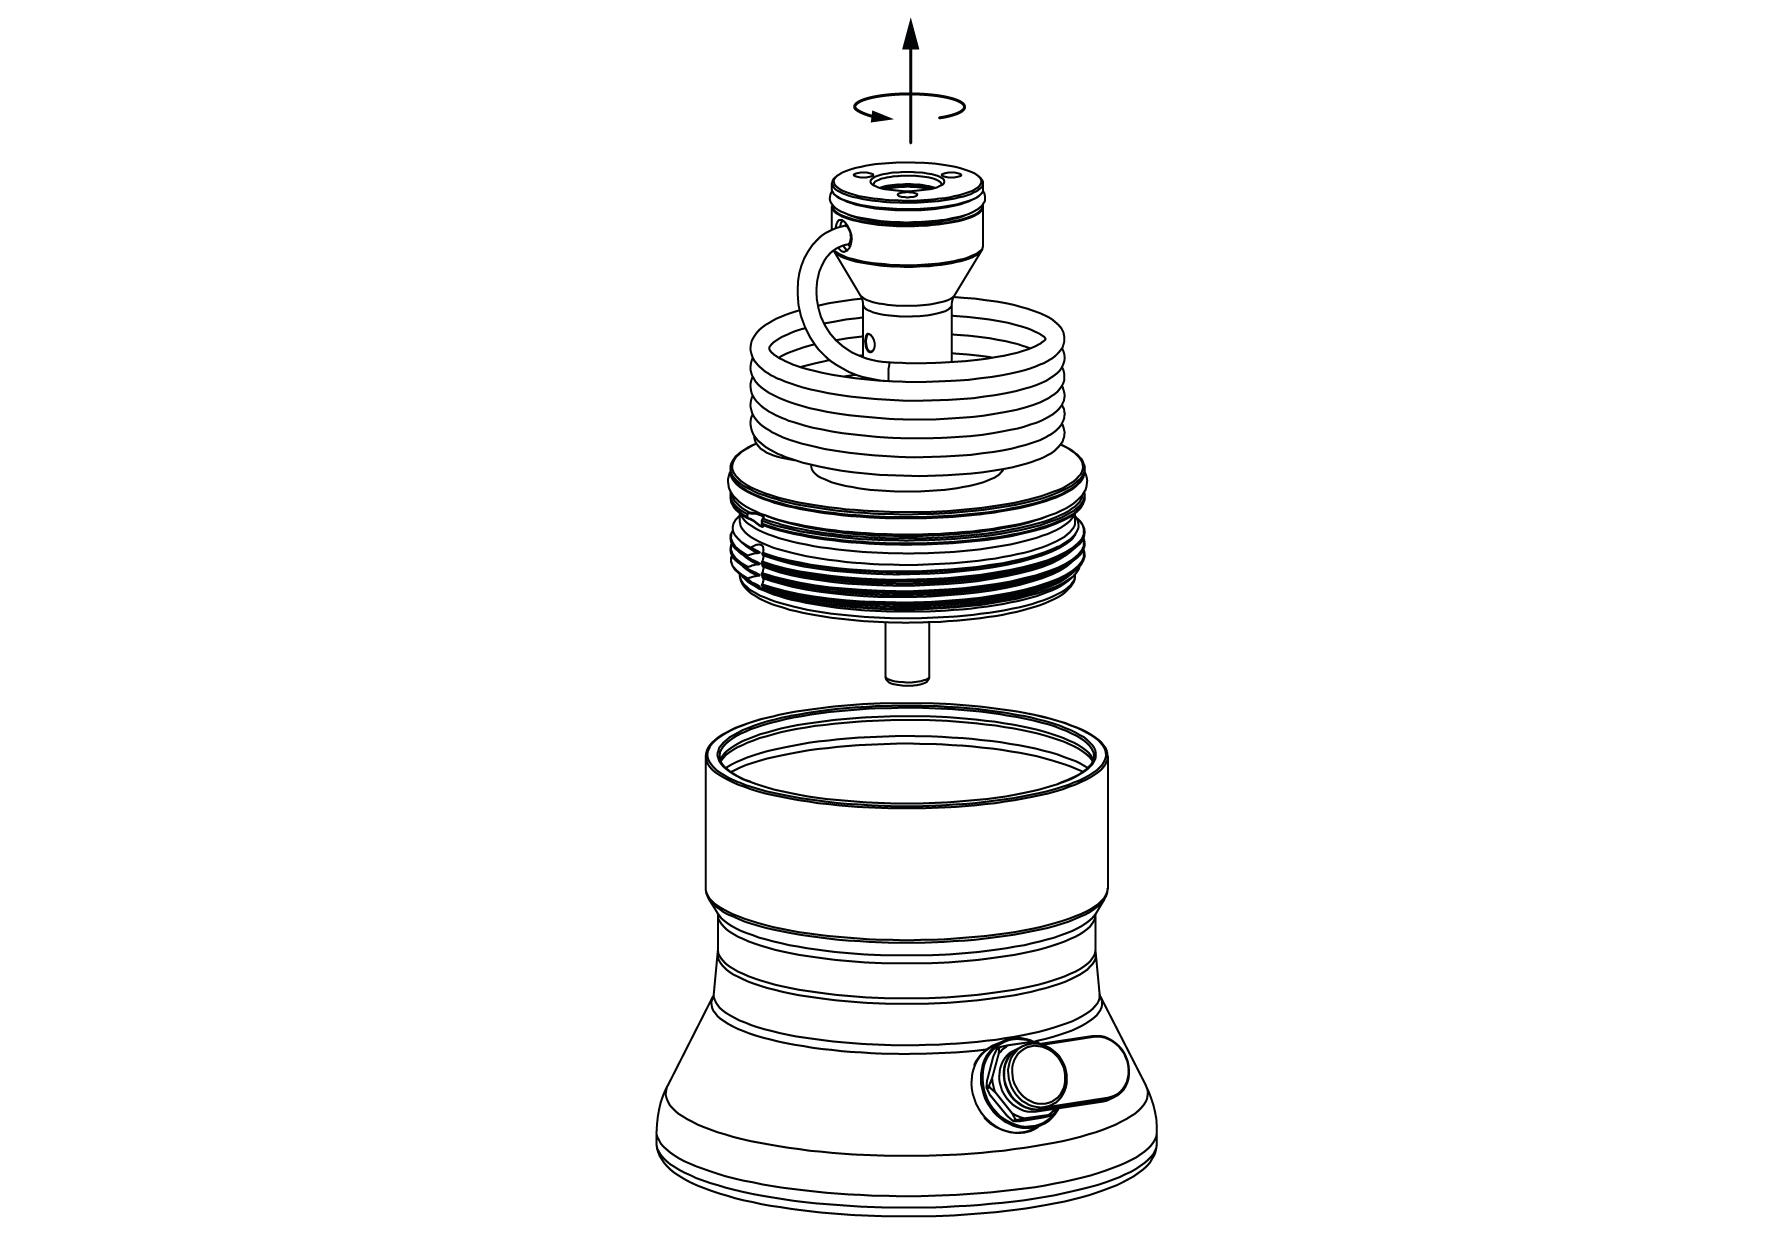
Step 4
Remove the Heat Exchanger from the Boiler.
Step 5 (Reassembly)
Reassemble the machine by following the steps 1 to 4 in reverse order. The video below demonstrates how to do this.
When assembling the Grouphead back onto the Heat Exchanger ensure there is at least a 3mm of gap between the Grouphead and the top of the Boiler, before tightening the screws. Failure to leave a gap can bend the Grouphead irreparably.
When fitting the Group Insulator in step 2, possition the Valve Chamber Seal onto the Group Insulator as indicated in the image below, before assembling onto the Grouphead.

Reassembly Video
Disassembly Video
Updated on 18 May 2026