Looking for help?
Find answers to your questions
-
Instructions
- Descaling
- Disassembly
- Replacing the safety ring
- Replacing the safety valve
- How To Fit The Overheat Repair Kit
- Low shot weight
- My safety valve opened
- Water is leaking from beneath the portafilter
- Water is leaking from the safety valve
- Water is leaking from the side of the machine
- My machine isn't producing espresso
- Water is spitting from the chimney
- Coffee is bubbling from the portafilter
- How to look after your heat transfer plate
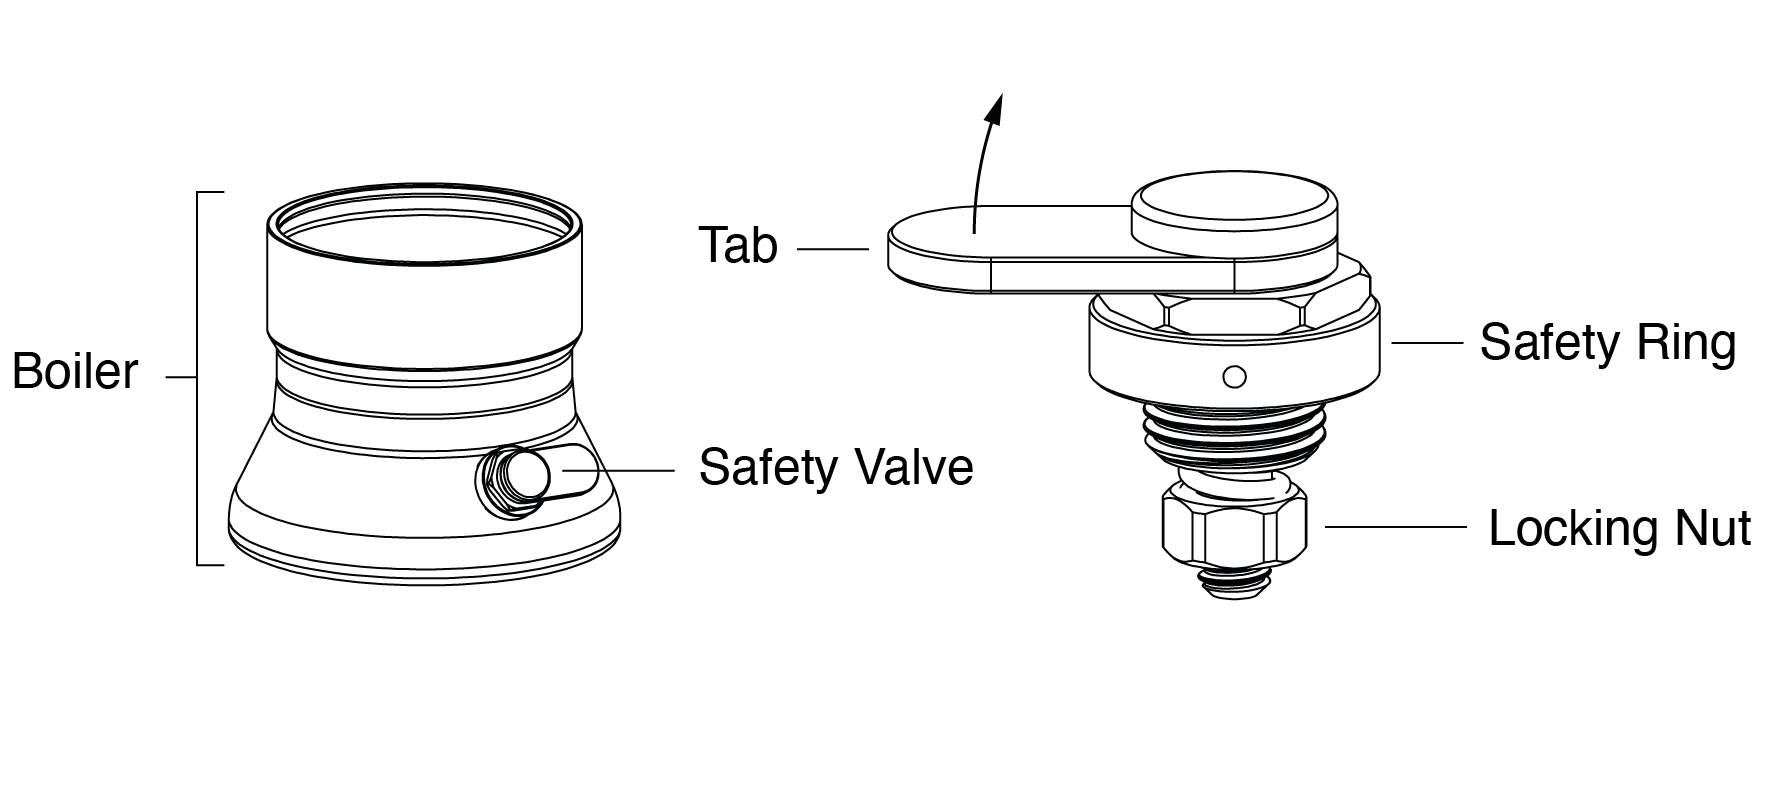
Replacing the safety valve
Replacing the Safety Valve takes approximatly 2 minutes.
Tools and Parts Required
- A replacement safety valve
- A 1/2" spanner/wrench. It's important that a correctly-sized or adjusted spanner is used.
Safety Warnings
- Do not attempt to adjust the Locking Nut on the Safety Valve. The Locking Nut sets the Safety Valve opening pressure and can only be adjusted with special tooling.
- Do not remove the Safety Valve while hot. Let the machine cool to room temperature first.
- Do not use a Safety Valve which appears damaged or which has been tampered with in any way. It is a safety device which ensures that the machine cannot operate in a dangerous state.
Step 1
While the machine is cold, seperate the Boiler from the machine.
Step 2
Remove the Safety Valve by unscrewing it anti-clockwise from the Boiler by using the ½” spanner/wrench. You should place your spanner around the hexagonal section with flat sides.
Step 3
Screw the new Safety Valve into the Boiler hand tight, in the clockwise direction, then use the ½” spanner/wrench to tighten so there is metal-on-metal contact between the Boiler and the Safety Valve.
(You won’t need to tighten it very hard, the thing to feel for is a sudden increase in resistance when screwing it in - that’s when you get metal-on-metal contact)
Updated on 18 May 2026