Looking for help?
Find answers to your questions
-
Instructions
- Descaling
- Disassembly
- Replacing the safety ring
- Replacing the safety valve
- How To Fit The Overheat Repair Kit
- Low shot weight
- My safety valve opened
- Water is leaking from beneath the portafilter
- Water is leaking from the safety valve
- Water is leaking from the side of the machine
- My machine isn't producing espresso
- Water is spitting from the chimney
- Coffee is bubbling from the portafilter
- How to look after your heat transfer plate
How To Fit The Overheat Repair Kit
Refitting your machine with the components in the overheat repair kit will take around 5 to 10 minutes.
Please note: if you have overheated your machine, it is worth checking that your heat plate is not warped or damaged in any way as this will affect the performance of the machine. If the plate is damaged, you can purchase a new one here.
Tools required
- 3mm Hex key/Allan wrench
- 13mm combination spanner/wrench
Component Names
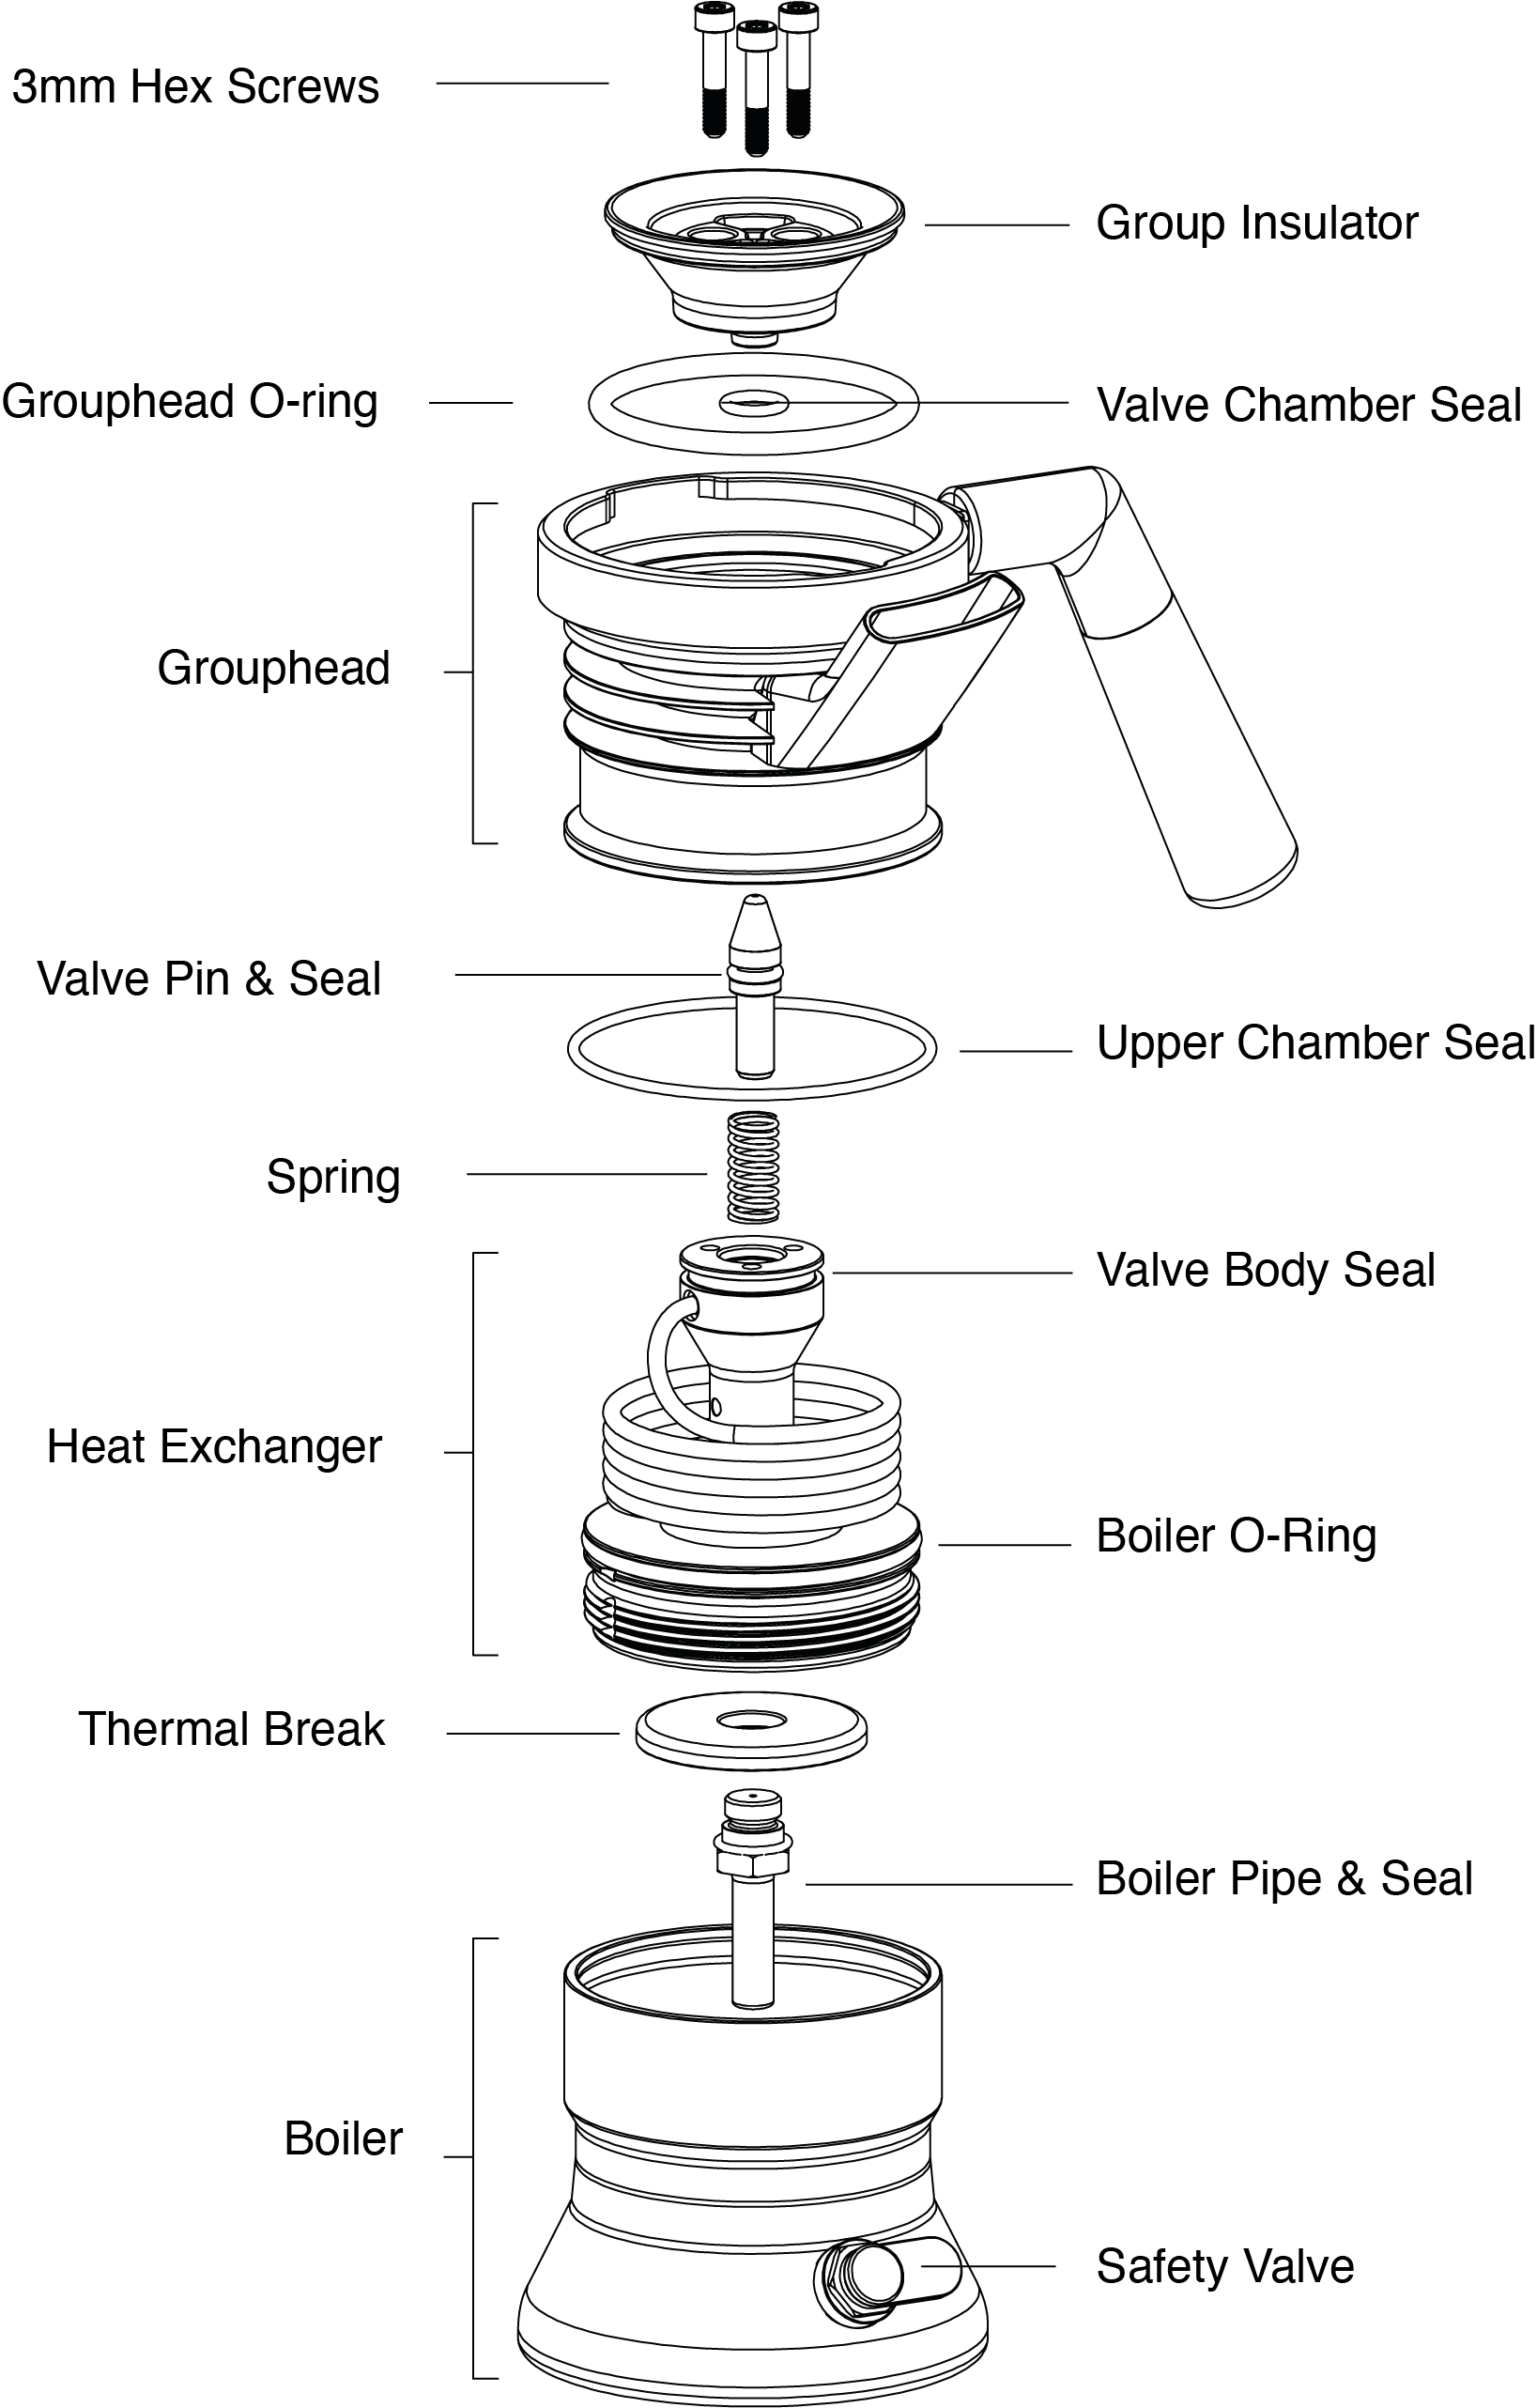
Step 1
Follow our disassembly instructions (here) to seperate the Grouphead from the Heat Exchanger.
Keep hold of your 3mm hex screws as you will need to reuse these!
Step 2
Take the Heat Exchanger and replace the Boiler O-Ring and Valve Body Seal with the replacements.
Step 3
Unscrew the Boiler Pipe from the base of the Heat Exchanger and replace the Boiler Pipe Seal with the replacement.
Step 4
Insert the Heat Exchanger into the Boiler and screw it partially into possition (2 full rotations is sufficient, or until you feel the resistance from the Boiler O-Ring).
Step 5
Insert the Spring and Valve Pin & Seal into the top of the Heat Exchanger.
Step 6
Place the Grouphead on top of the Heat Exchanger. The Valve Pin should pass through the hole at the bottom of the Grouphead. Rotate the Grouphead clockwise until the three screw holes in the Heat Exchanger align with the three holes in the Grouphead.
Step 7
Place the new Grouphead O-ring into the top of the Grouphead, and fit the new Valve Chamber seal onto the tip of the new Grouphead Insulator.

Step 9
Place the Grouphead Insulator into the top of the Grouphead, whilst aligning the three screw holes in the Grouphead Insulator with the three screw holes in the Grouphead. Press down firmly with your fingers until the Group Insulator is fully located.
Whilst holding the Grouphead Insulator in possition with one hand, put one of the three 3mm Hex Screw into the screw hole and and screw into possition with the hex key. Once fully screwed into possition, repeat with the two remainging screws.
Toighten the screws until they are hand tight. You should not need to use significant force.
Step 10
Using the 13mm spanner/wrench, screw the new Safety Valve onto the Boiler until the valve is sitting flat against the Boiler.
That’s it! If you have any questions please do get in touch with us!
Video
Updated on 18 May 2026